This begins a series where I’ll explore some correctness and originality issues of the Pagoda or W113 cars. Let me state first that I’m not saying we should all only drive perfect specimens. There are some very good cars that while less than perfect may suit ones needs. It is just helpful to know the difference between various levels of authenticity.
Disclaimer: If you are considering the purchase of a car, there is no substitute for a direct pre-purchase inspection by a competent professional. The information contained here is for informational purposes only and will only touch on the subjects.
Originality is king when it comes to vintage cars. Not only does finding a 40ish year old car that has not been altered by numerous past owners add your enjoyment of the car; the more original features that you can substantiate the better when it comes time to sell your treasure.
Seasoned car collectors/investors have learned that a solid, sound, original body is the most important aspect of a vintage car. Mechanical rebuilds are straight forward and not costly compared to trying to correct a previously crashed or rusted car. One cannot throw enough money at a car with a bad body to make it right(or equal to a car with a great original structure). So with that in mind we’ll start with how to tell how original the front body structure is. The factory made our job quite easy actually.
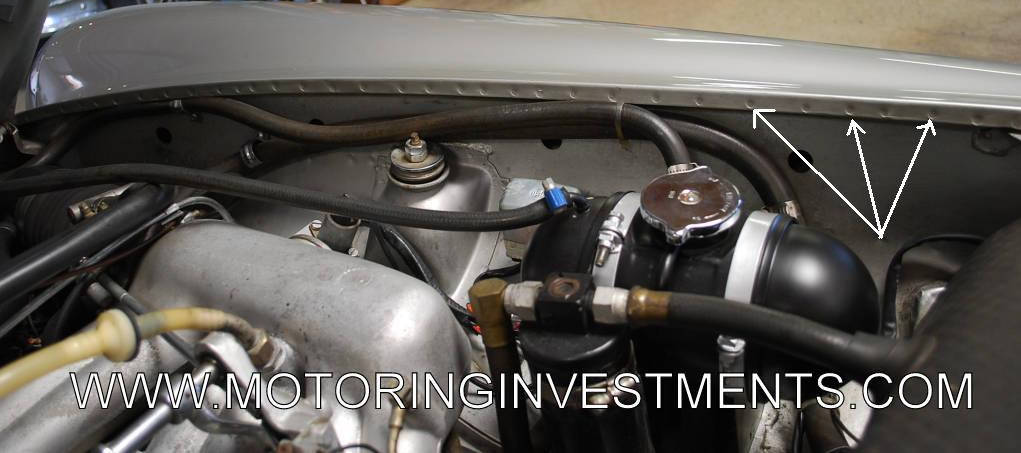
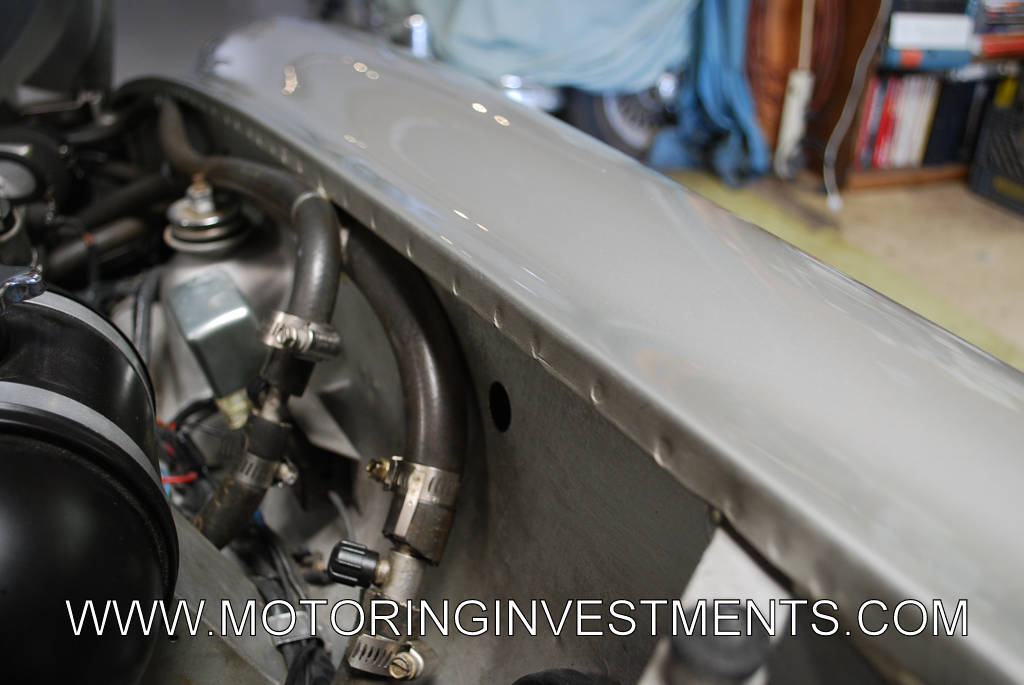
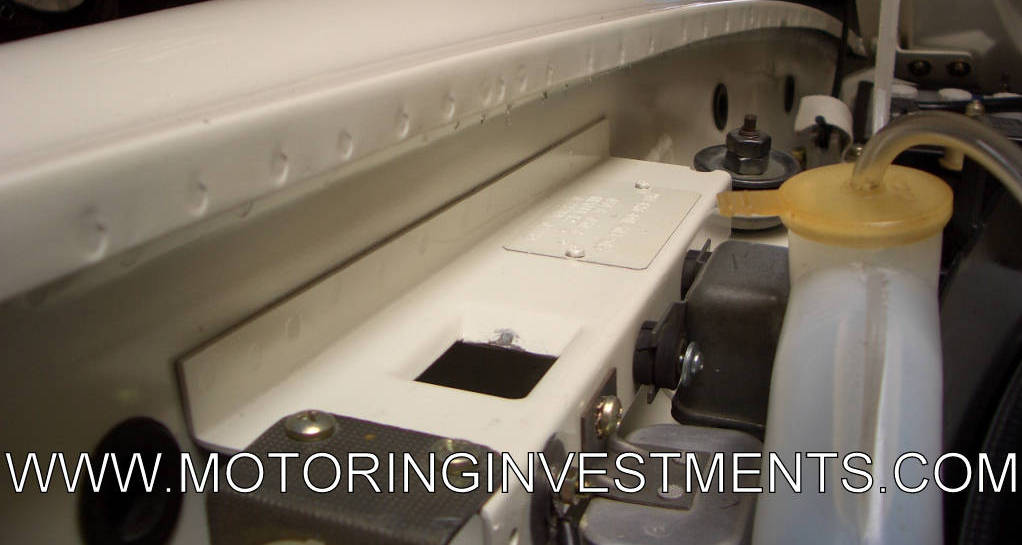
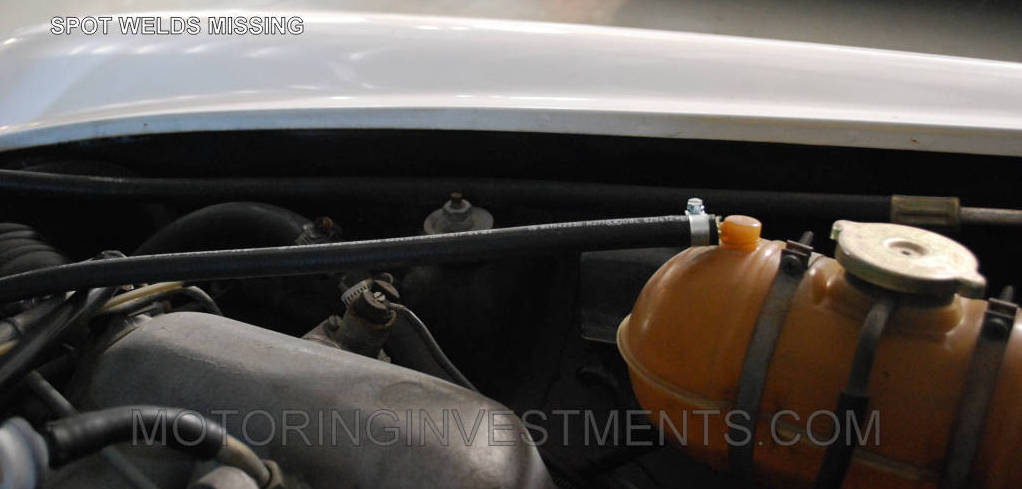
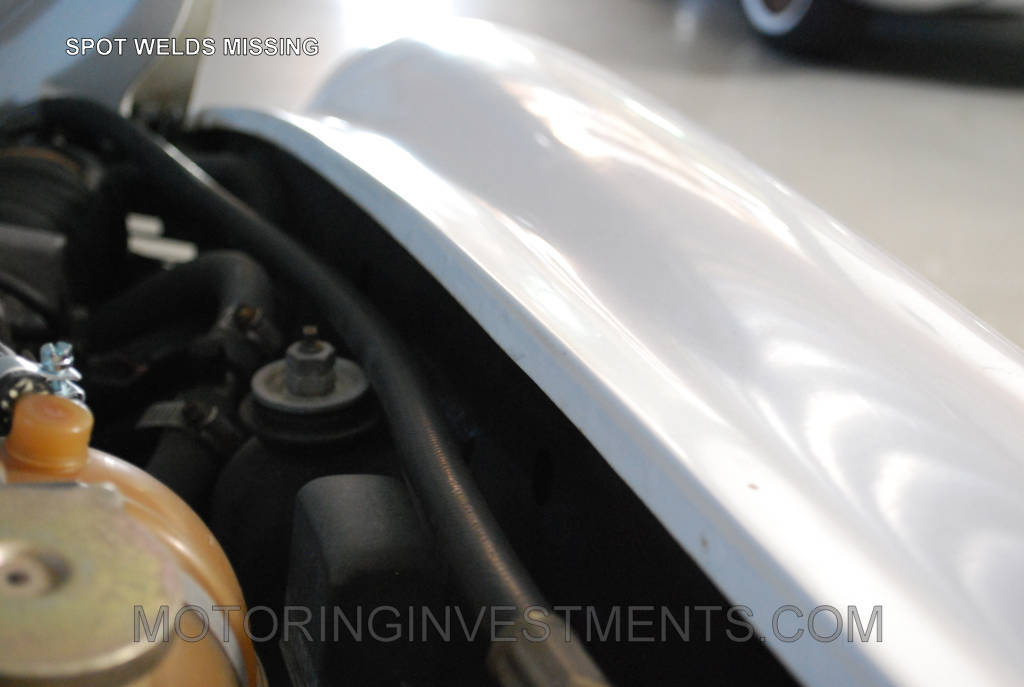
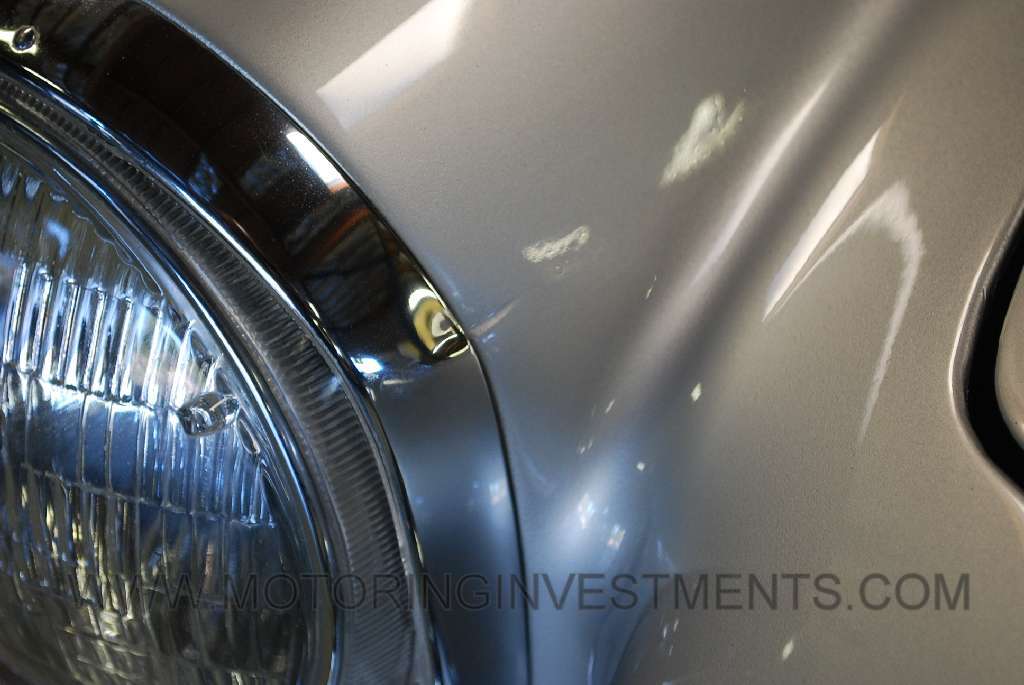
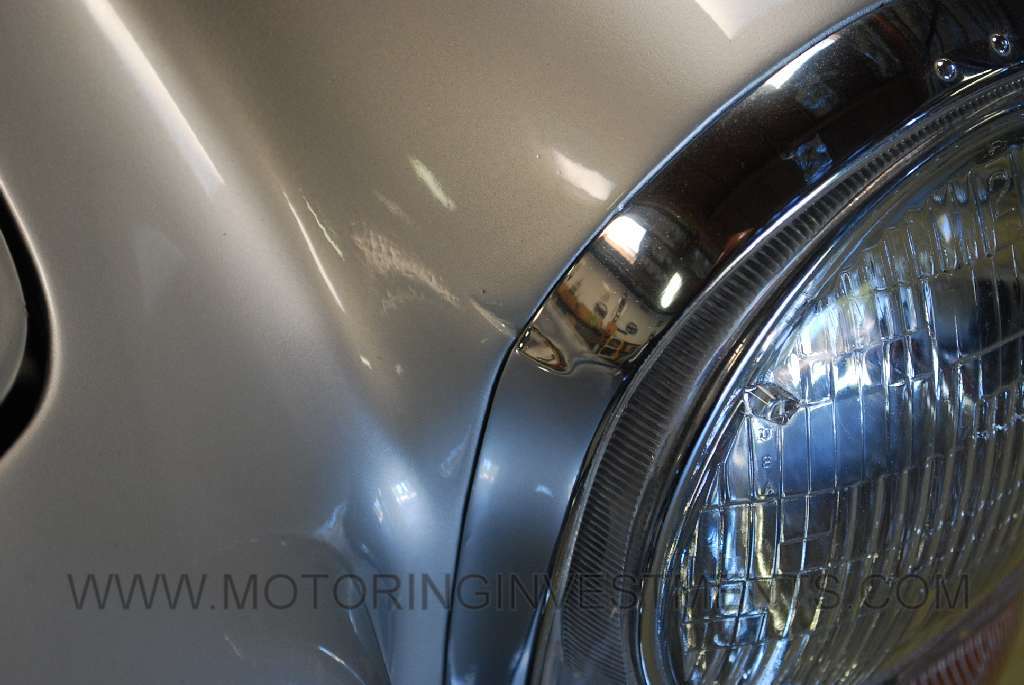
Most of the body was assembled by spot welding various panels together. Since most body shops used a different welding process to replace panels, one has only to look at the type of welds. The most prominent factory spot welds are just inside the engine bay along the tops of the front fenders. If these welds are not visible we know something happened after the car left the factory. Maybe a fender was heavily worked and body filler is covering the welds or possibly a fender was replaced. Due to the cost of labor to straighten a fender it was typically less costly just to replace a whole fender. In doing this the body shop most likely used a plug weld or simply mig welded the bottom of the two panels together(I’ve even seen them pop riveted!). The appearance will be very different than the factory spot welds.
The first three images below show factory original spot welds.
Here the edge of the fender is smooth indicating repair work.
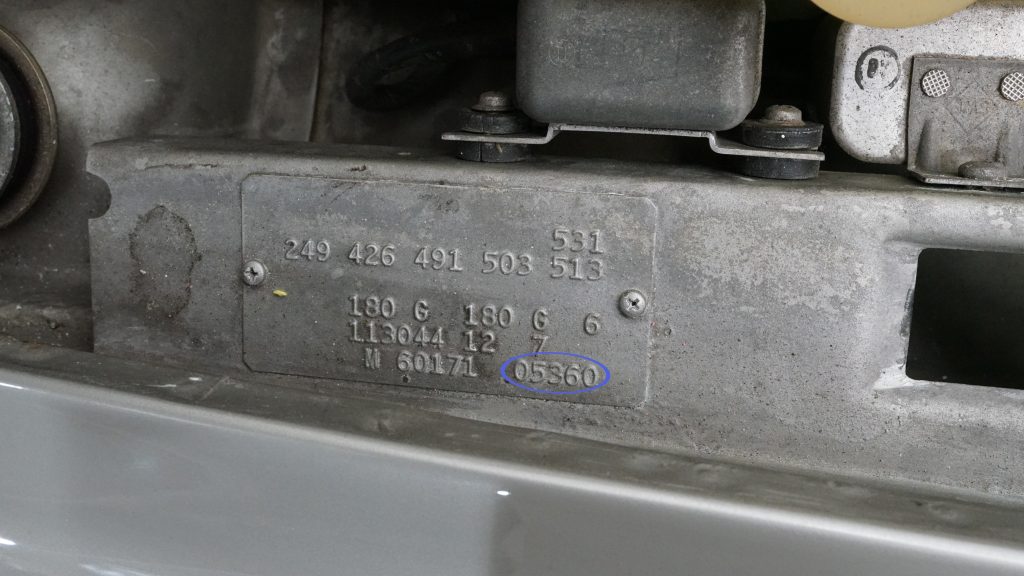
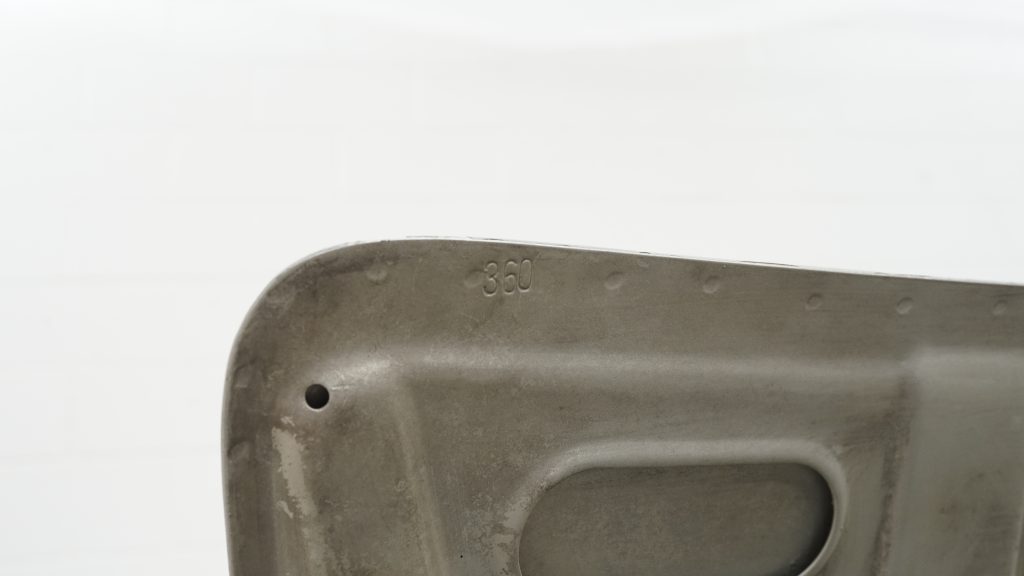
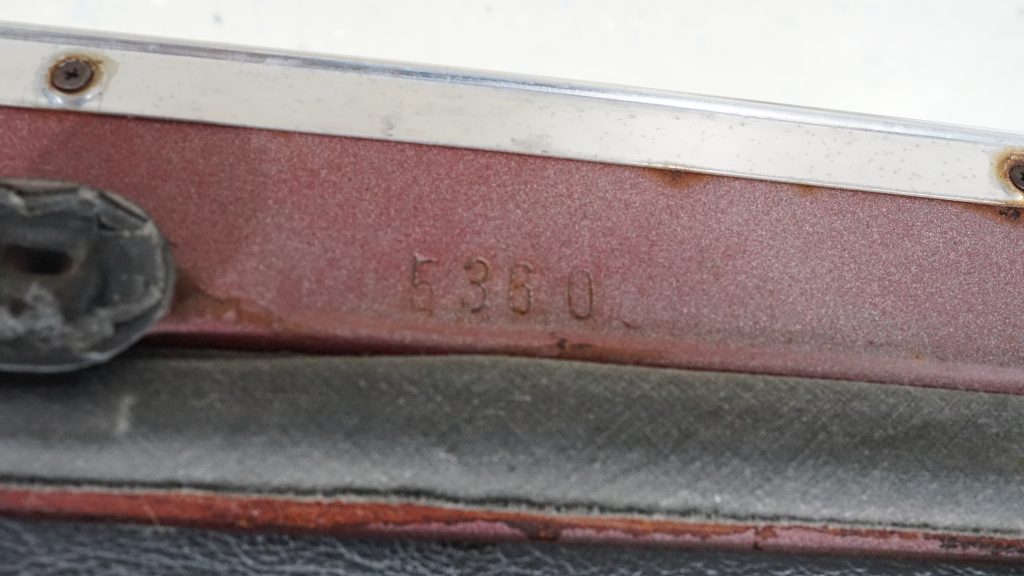
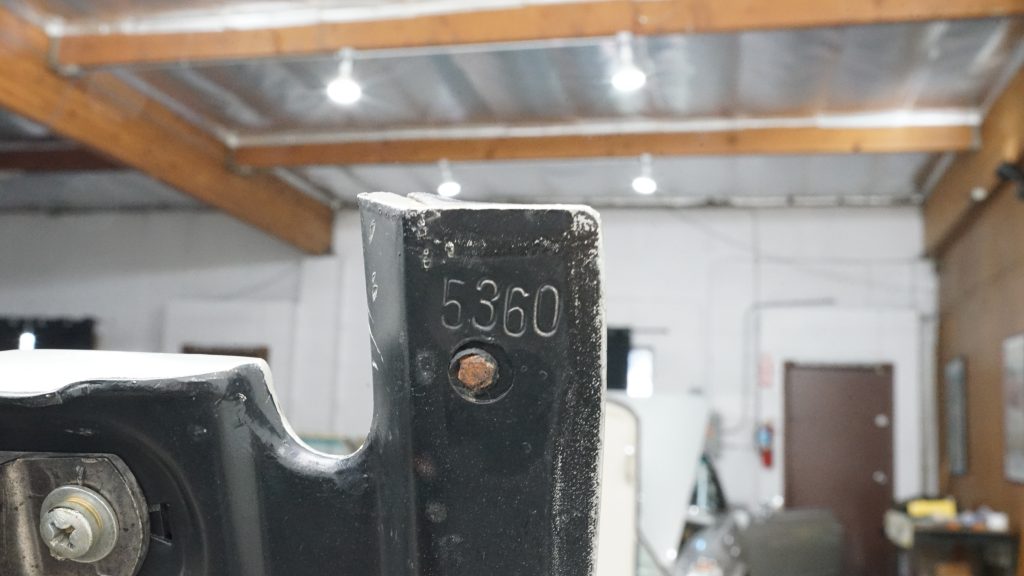
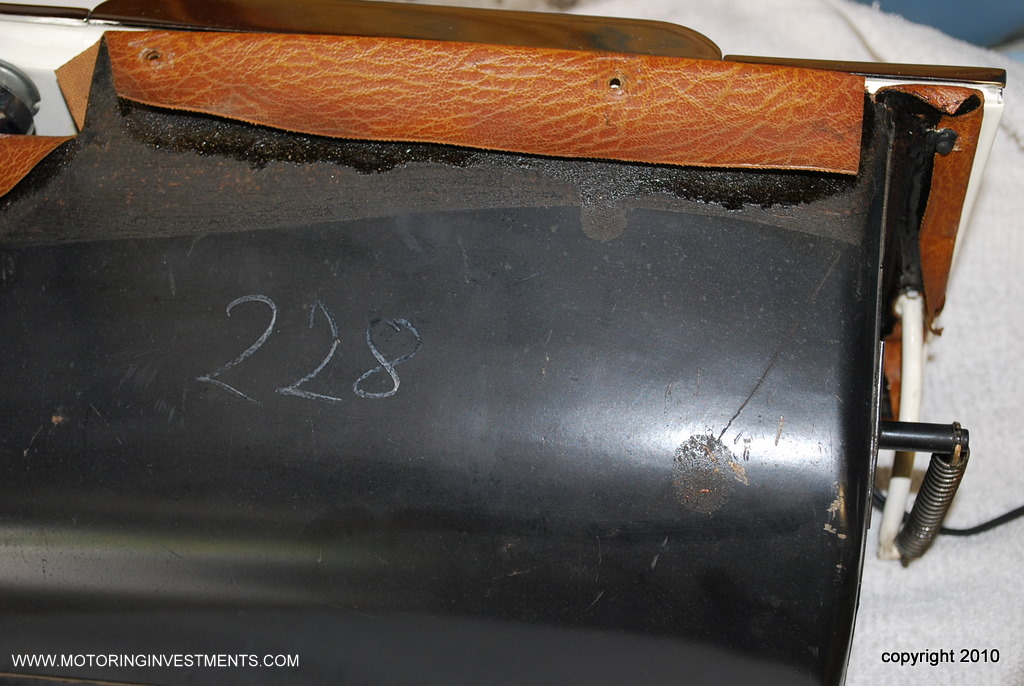
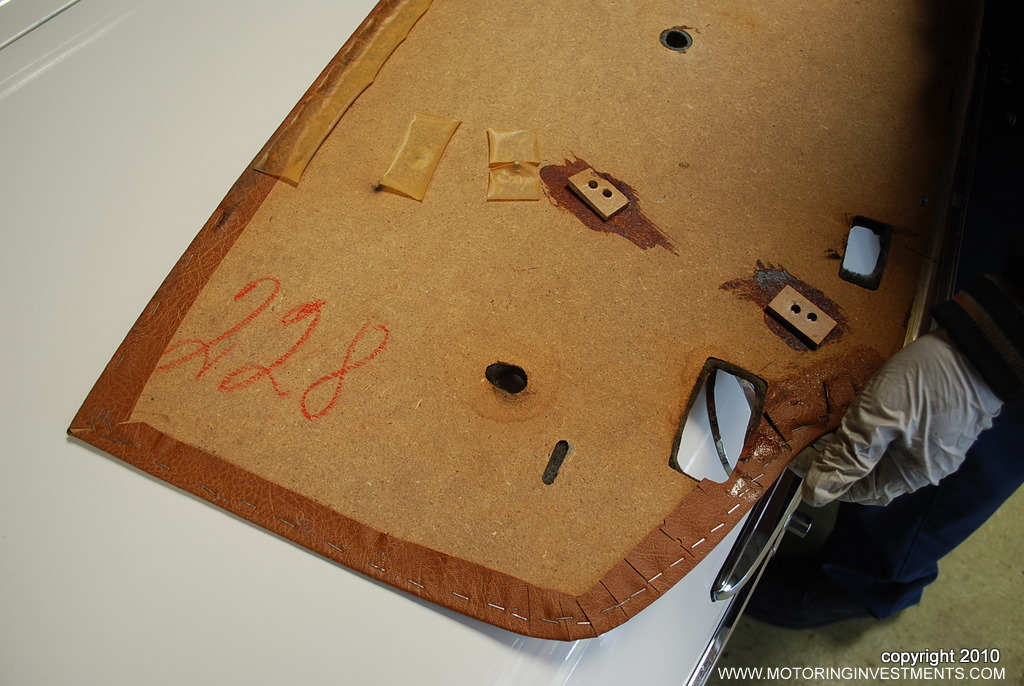
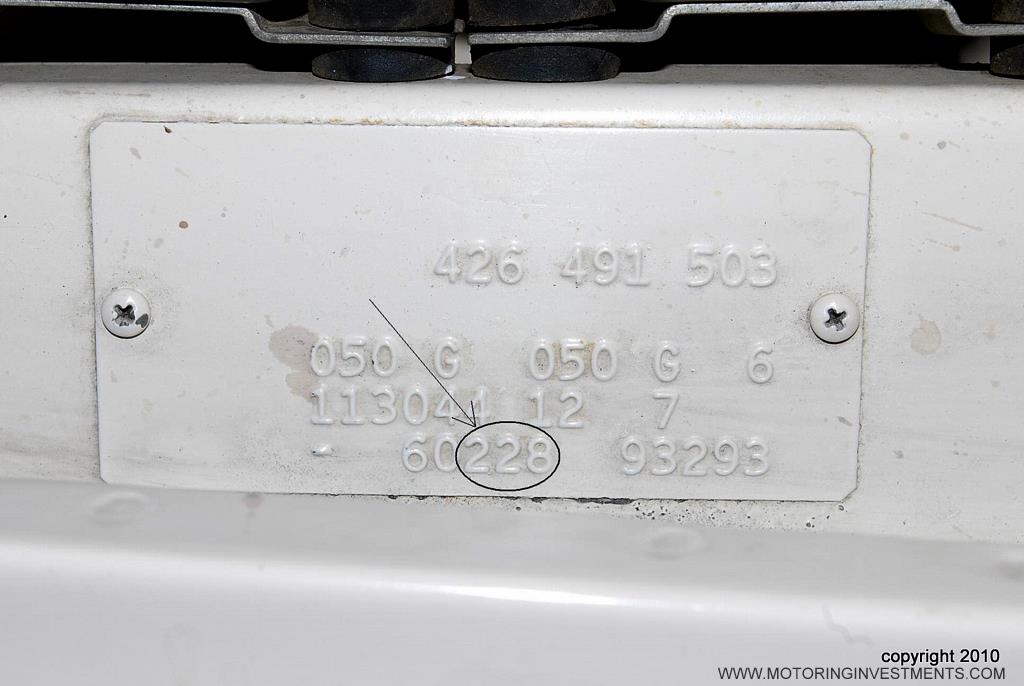
Also, the factory stamped the last three or four digits of the body number on the top left corner of the hoods. If this number is gone or differs from the ID plate then something happened. Obviously the two numbers below don’t match telling us they belong to different cars.
Also, the factory stamped the last three or four digits of the body number on the top left corner of the hoods. If this number is gone or differs from the ID plate then something happened. Obviously the two numbers below don’t match telling us they belong to different cars.
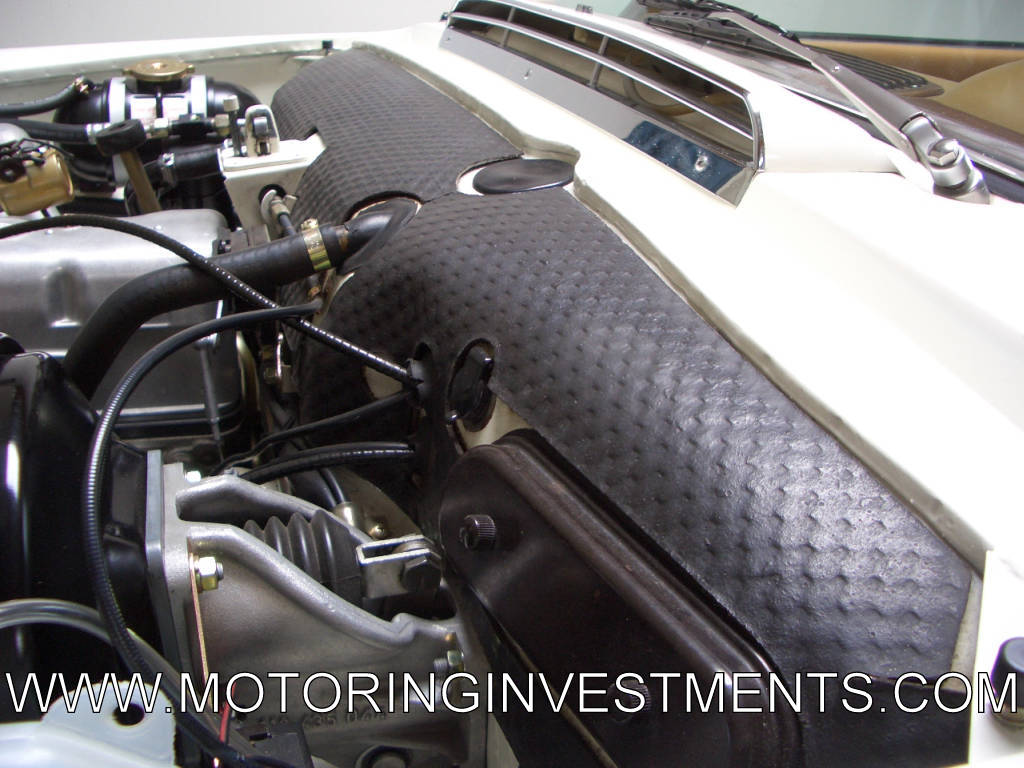
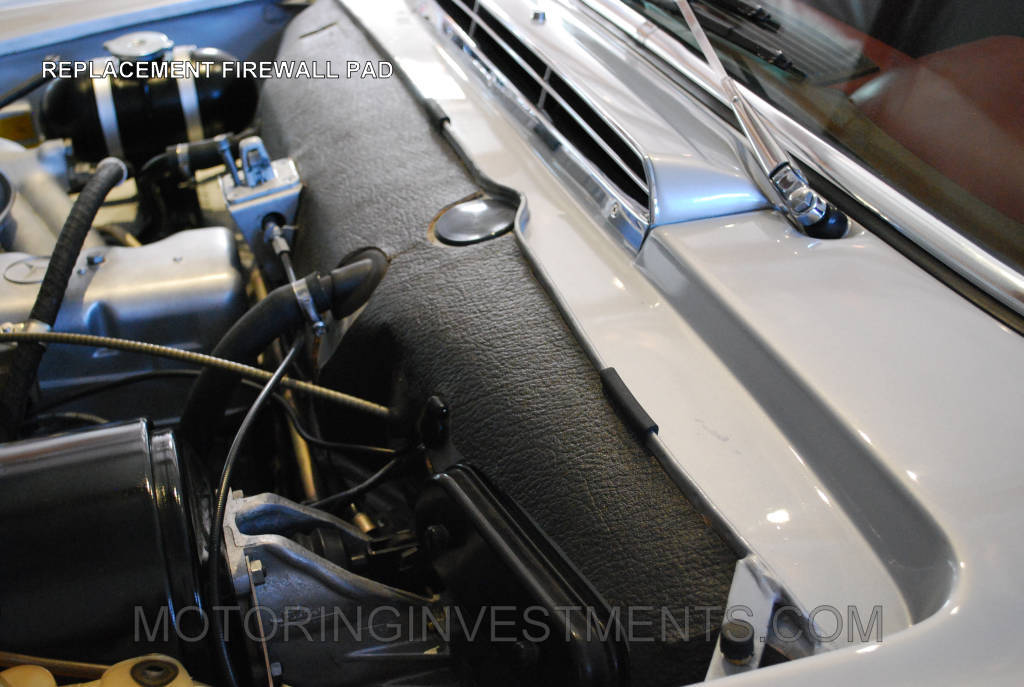
Not part of the structure of the car but a treat to find none the less; a presentable, original firewall pad. No one sells a new replacement that has the correct textured embossing. What Mercedes sells as a replacement has a different finish; sort of a faux-leather crinkle surface.
Of course if one is doing a restoration and the existing fire wall pad is shot, outside of finding a good used pad there is no choice but to buy the new replacement.
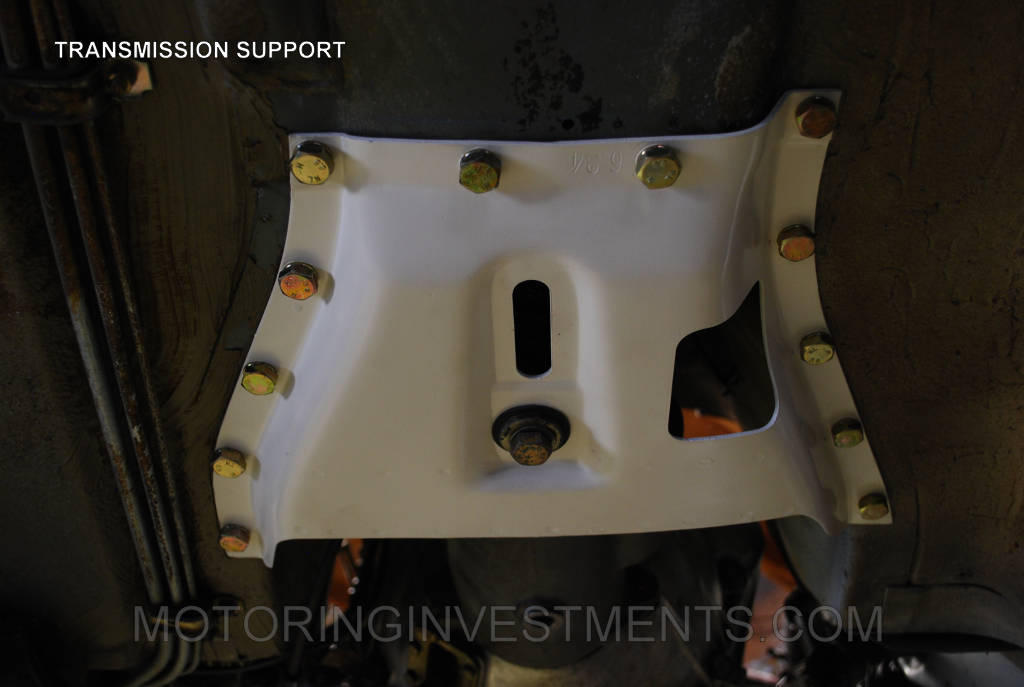
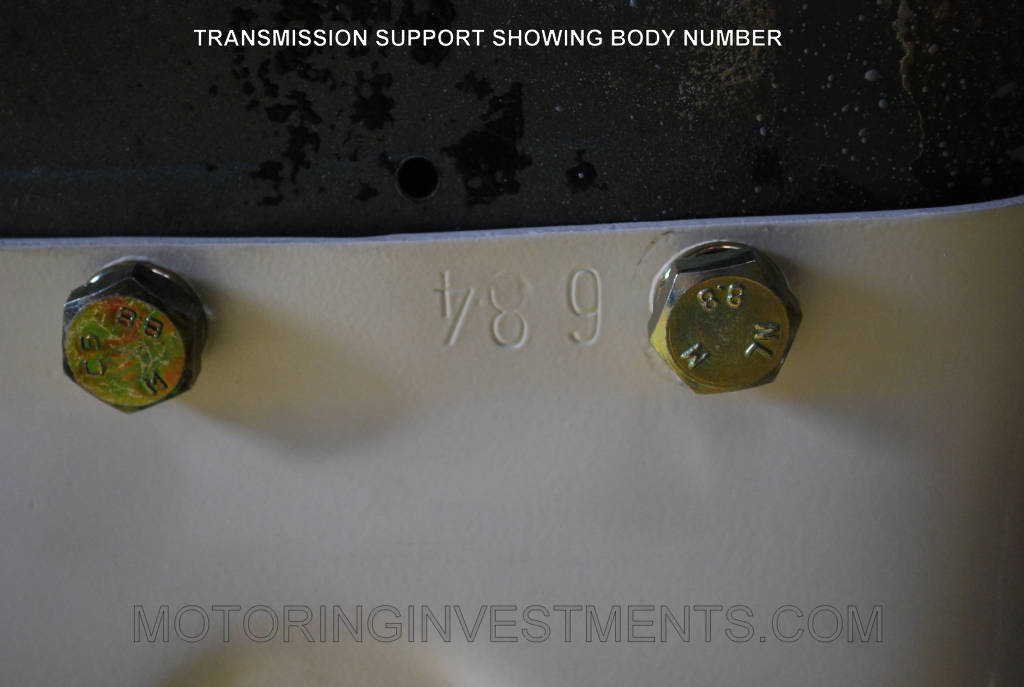
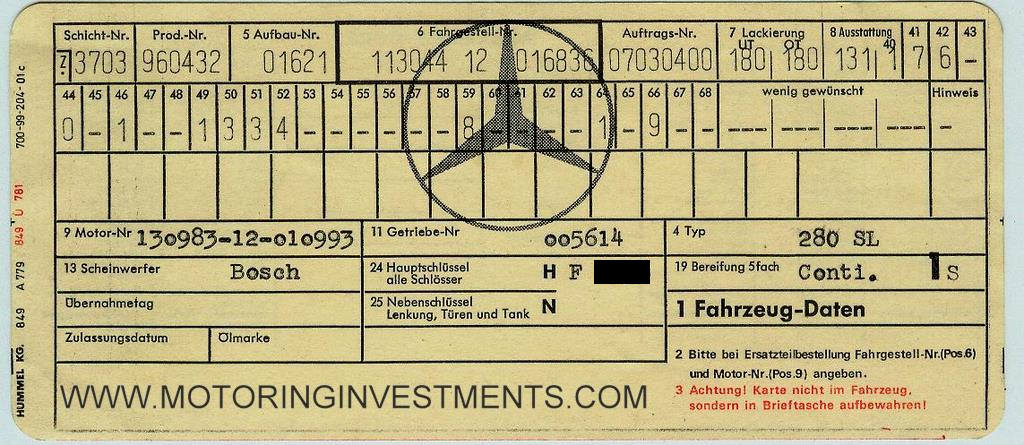
There are more body number stamps besides that on the hood. This number is also repeated on the base of the hardtop, the boot box lid, the transmission support plate and on the data card(should be in the owner’s manual pouch) at position #5(280SLs).
I’ve shown body numbers from several cars. On an individual car the numbers should all match. (note: sometimes this number is on the face-up side of the plate)
Runs, Sloppy Welds & Bare Spots
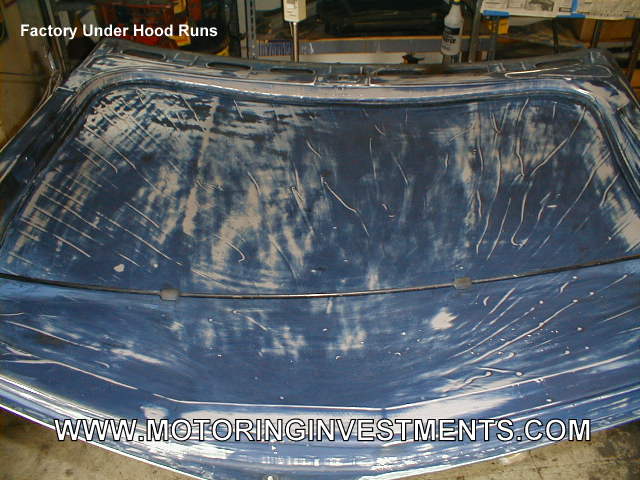
Ever been to a local car show and notice a beautiful car that is let down by a few runs in the paint? We think, “this proud owner spent so much money restoring his car but got cheap with the paint job.” Well maybe we should not be so quick to judge. If we examine a Pagoda hood on the bottom side that has never been repainted we find a large number of runs in the paint. I’m pretty sure at least one of the primer coats was done by dipping the hood (if not dipped they were hung vertically to cure after spraying a liberal coat). It simply was not considered important to sand these away before applying the color coats since most of the time the hood is closed. We also find similar runs in the satin black of the underside of the trunk lid. If you are doing a high point restoration I suggest that you not remove the runs if possible since this is another originality marker. Factory replacement hoods come with a nice, uniform, run-free coating of satin black all over.
Below is a hood bottom that has been lightly sanded exposing the runs which exhibit as high spots.
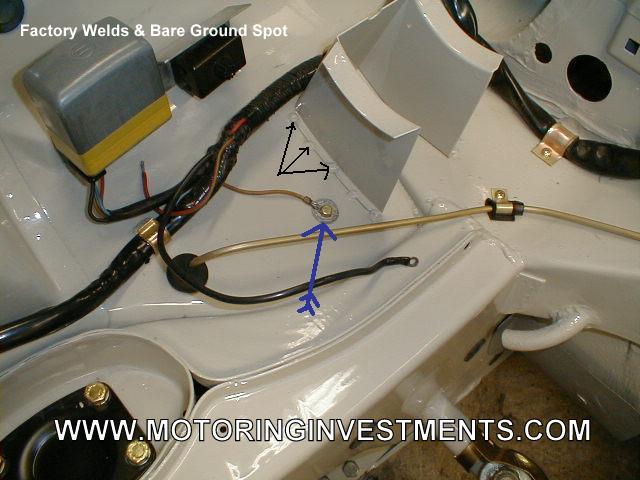
In most cases during the assembly of the body structure when two pieces of sheet steel were joined together, spot welds were used creating the neat row of dots (see front fenders at the top of the page.) There are however exceptions such as the way the coolant expansion tank pedestal is affixed. It has a row of what appear to be hand made mig-welds on each leg; basically rough bumps in the metal. I recently had a technical manager from one of the top Mercedes tuning companies examining a customer’s car for possible purchase. Peering under the open hood he had said, “Oh this car has had some body work done.” I asked him to show me the evidence and he pointed to these very welds that we are discussing. I had to show him five other cars that all had the same welds before he would take my word that they were indeed factory. In an attempt at redemption he indicated that the welds were a bit rougher on this car than on some of the others. Finally we agreed that maybe the workman on this particular car had one extra beer at lunchtime before completing these welds and we had a good laugh.
Another interesting feature is the lack of paint in perfect circles in some areas of the engine bay. These areas are where the various ground straps attach to the body. The contact must be “metal-to-metal” in order to conduct current and these paint-less circles is how the factory achieved this.
More Numbers
Production number written on the seat backrest board and carpet.
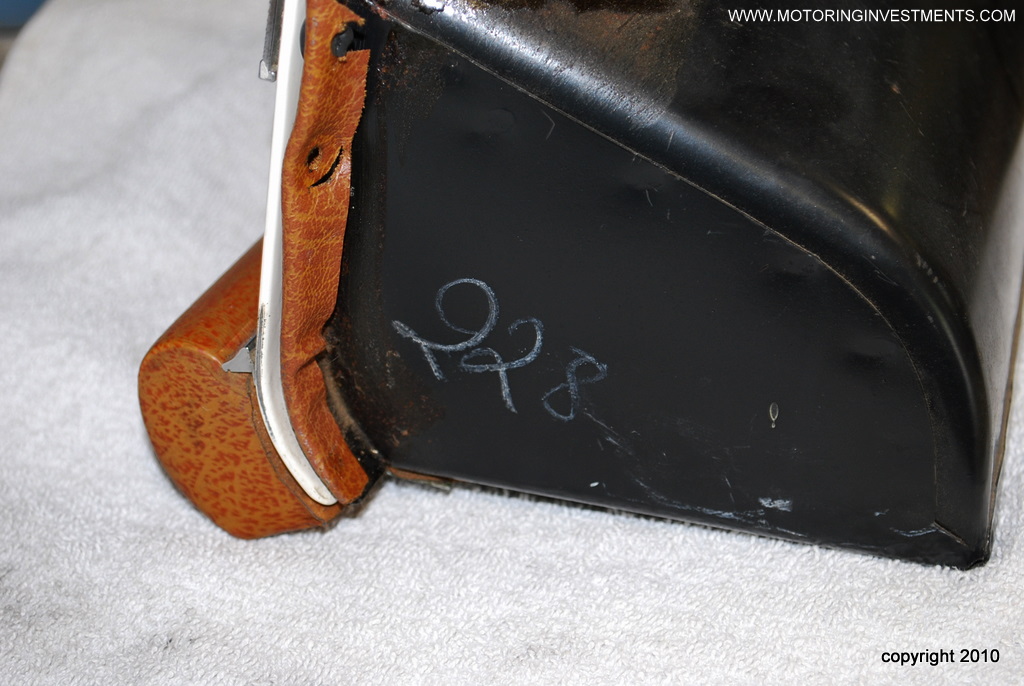
Notice that the glove box and inner door panel all have the last three digits of the production number (different car above) written on them.
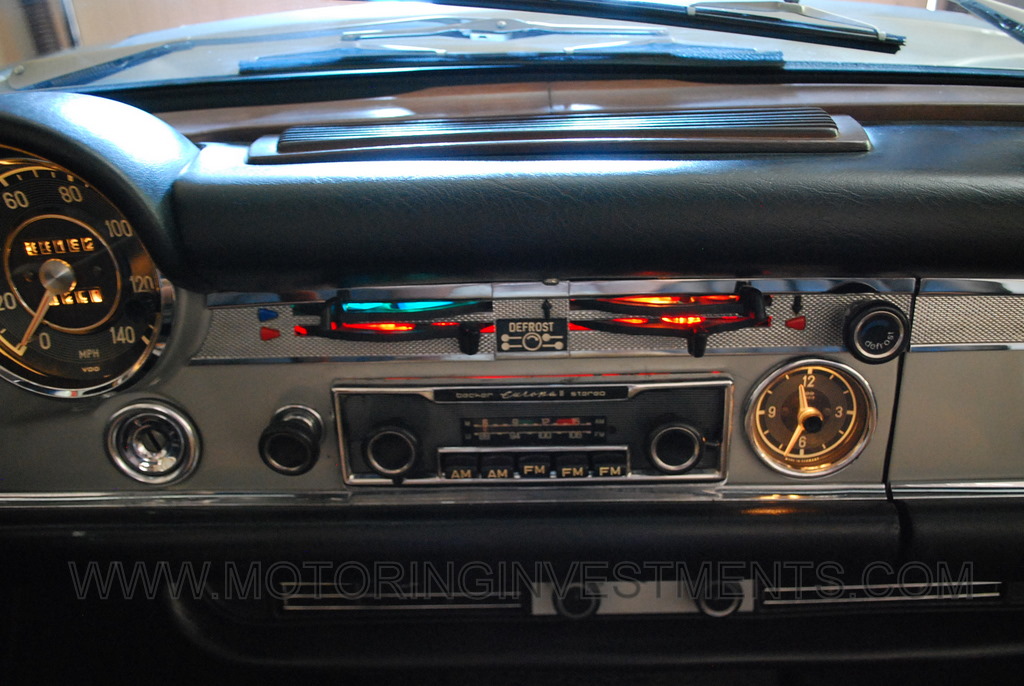
Few items are prone to failure on these cars. One area often that needs attention on cars that have not had the best of care are the heater levers. They often times are found disintegrated on cars from warm climates. Other times their linkages have come apart from the components they are supposed to operate(heater valve & air flaps).
Owners with only a casual interest sometimes don’t know that they are supposed to emit a colorful glow when the lights are turned on. They can be rather labor intensive to repair properly (that is probably why we see so many cars for sale with them broken).
The famous “notches”. These are many times long gone due to re-paints by body shops who didn’t know they were supposed to be there.
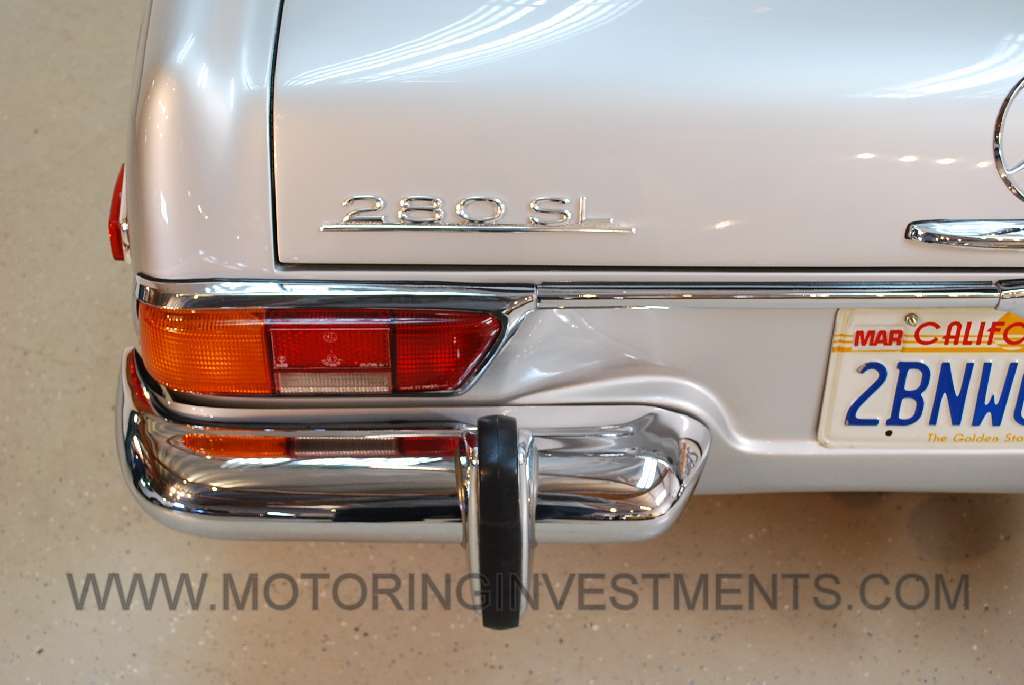
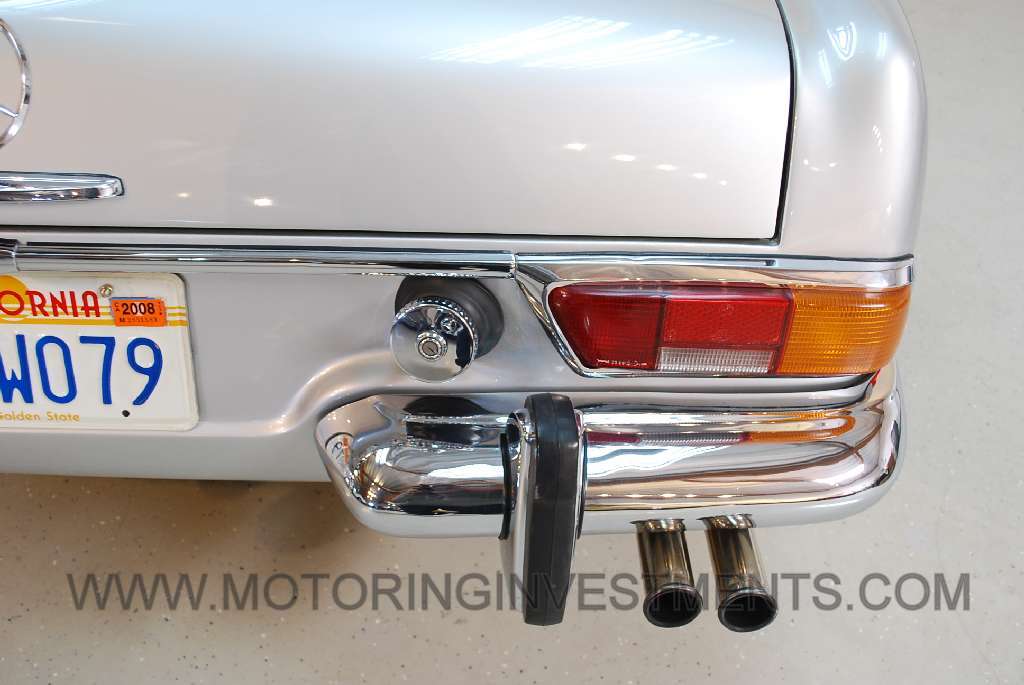
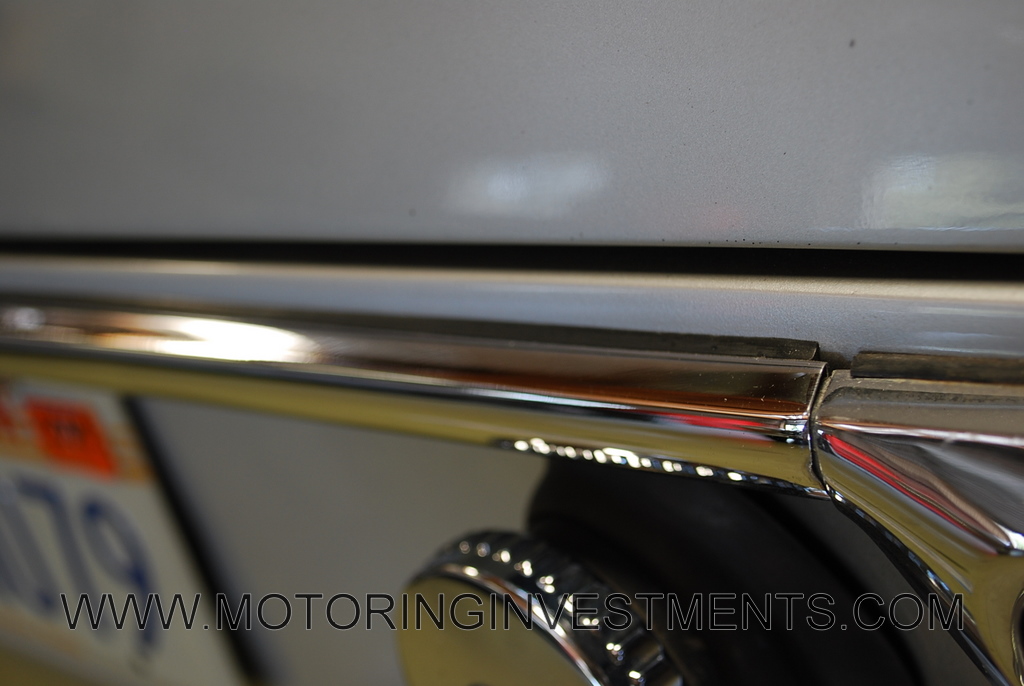
Here is a little known part. Notice the narrow rubber weather seal on the top of the chrome molding. This piece of rubber mirrors the piece on top of the tail light housing. I don’t think it is any longer available new, so many times it is missing on re-done cars. Note that there is some question as to whether these were originally on the early cars, e.g. 230SLs.
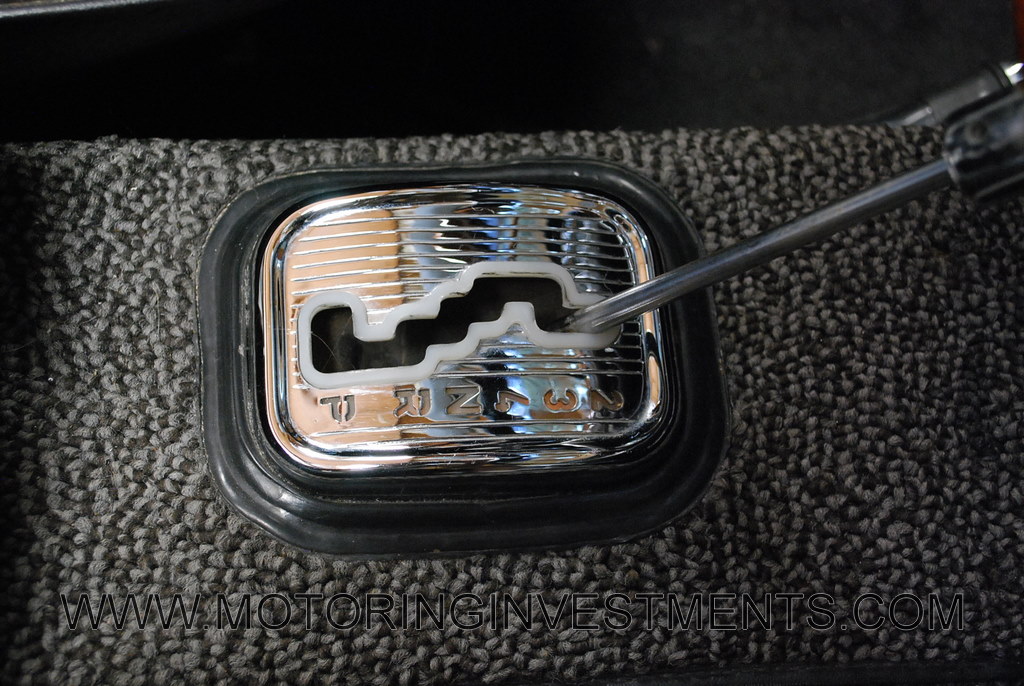
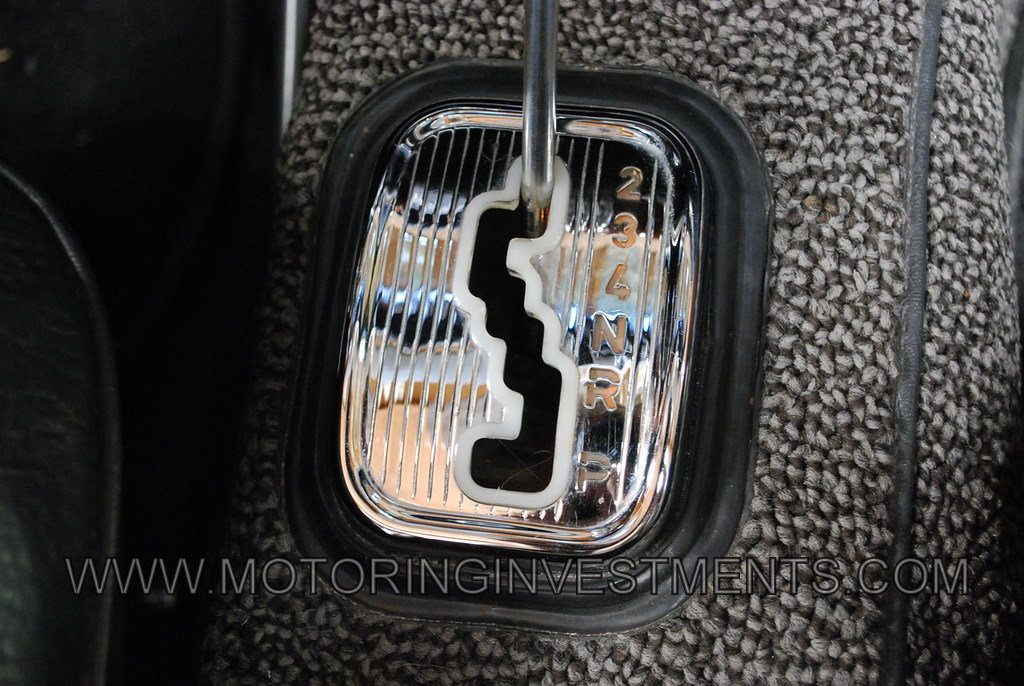
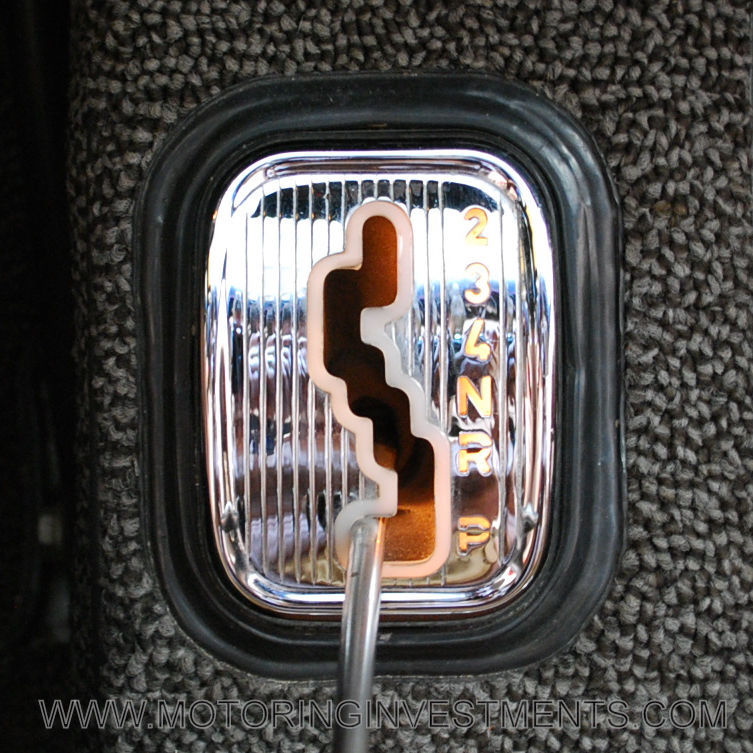
Another rare piece only found on original cars is the rubber molded-in binding on the carpet around the shift mechanism. It was not stitched or glued but molded in during the manufacturing process. Modern replacement carpet typically comes with a carpet colored vinyl or leather binding that is stitched in place. Nothing terrible about that but it merely drives home the point that they’re only original once.
Also note the white plastic shift-gate insert which is typically broken from years of use and the shift positions that light up with the running lights.
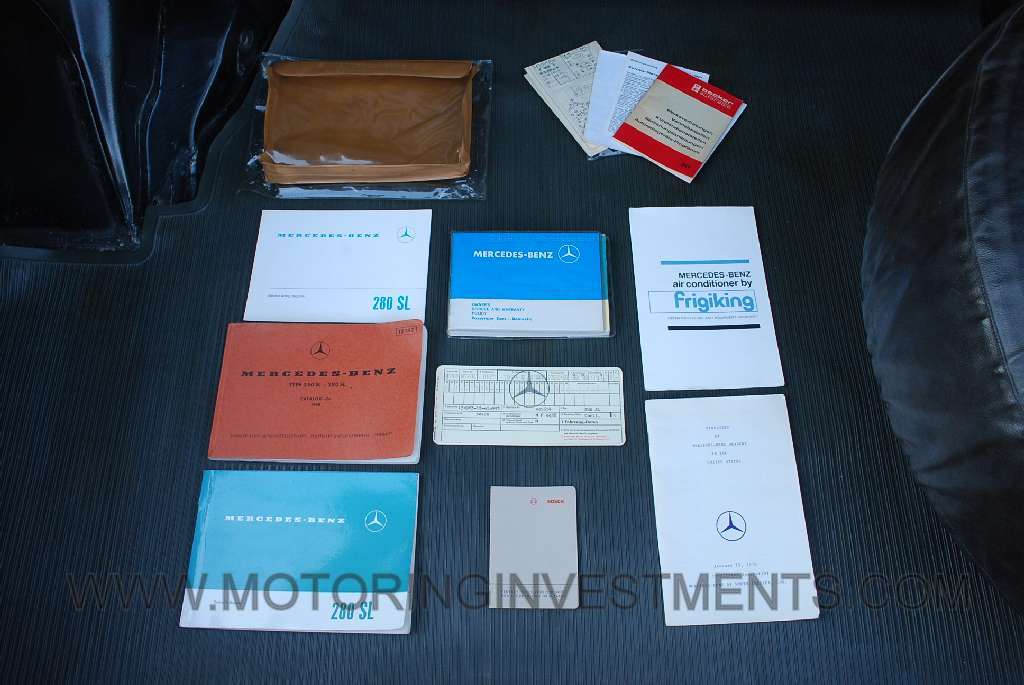
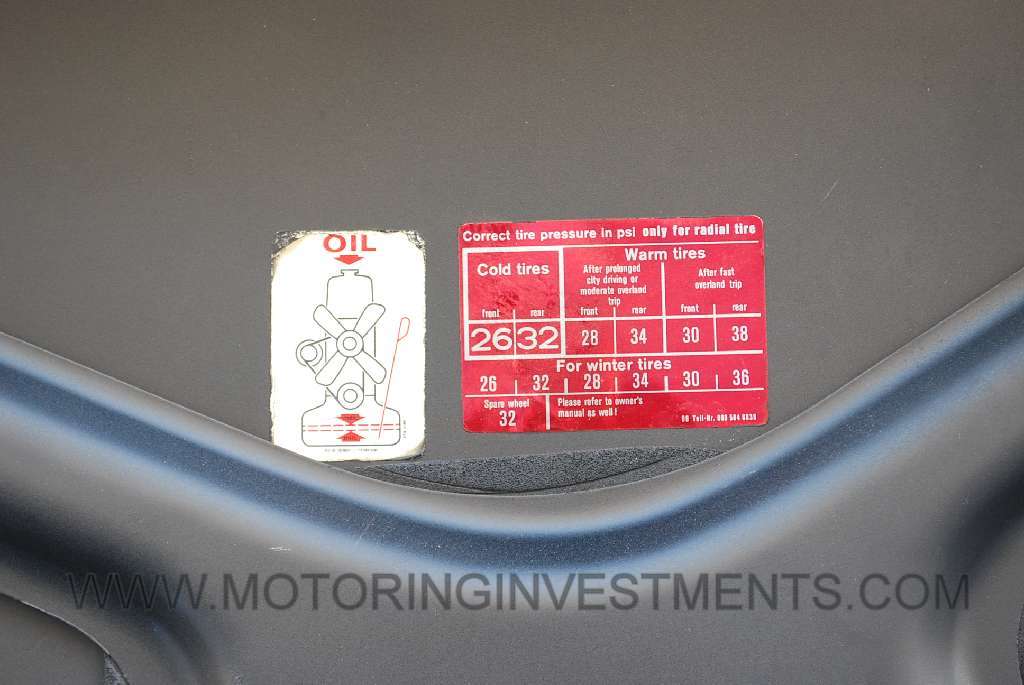
Factory owner’s books and the trunk lid decals.
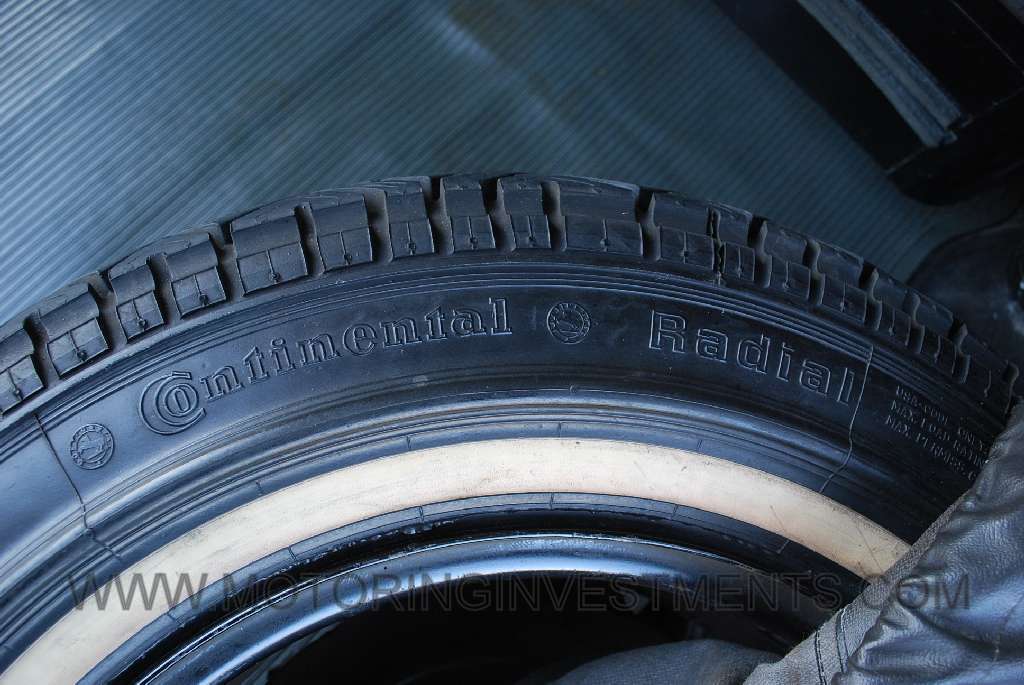
The factory data card is where you will find all of the numbers including that of the chassis, engine, paint, upholstery and keys (blacked out here). Even the original brand of tires supplied is here under No.19, “Continental” in this case. You’ve heard the term, “matching numbers”, this is how we know conclusively.
There were several different tire suppliers originally on the Pagodas, in this case “Continental” was chosen. Most of the manufacturers no longer provide this original 185/14 size. Today a Pagoda owner has several choices of tire. Coker Tire offers a reproduction of the original white wall, Phoenix Firestone (different tread though) in the 185/14 size. Vredestein offers a black wall in 185/14. The other choices involve going to a bit wider tire (195/75 14 or 205/70 14) with roughly the same rolling radius as these sizes are more readily available today. If anyone knows of another manufacturer of the 185/14 size please let us know.
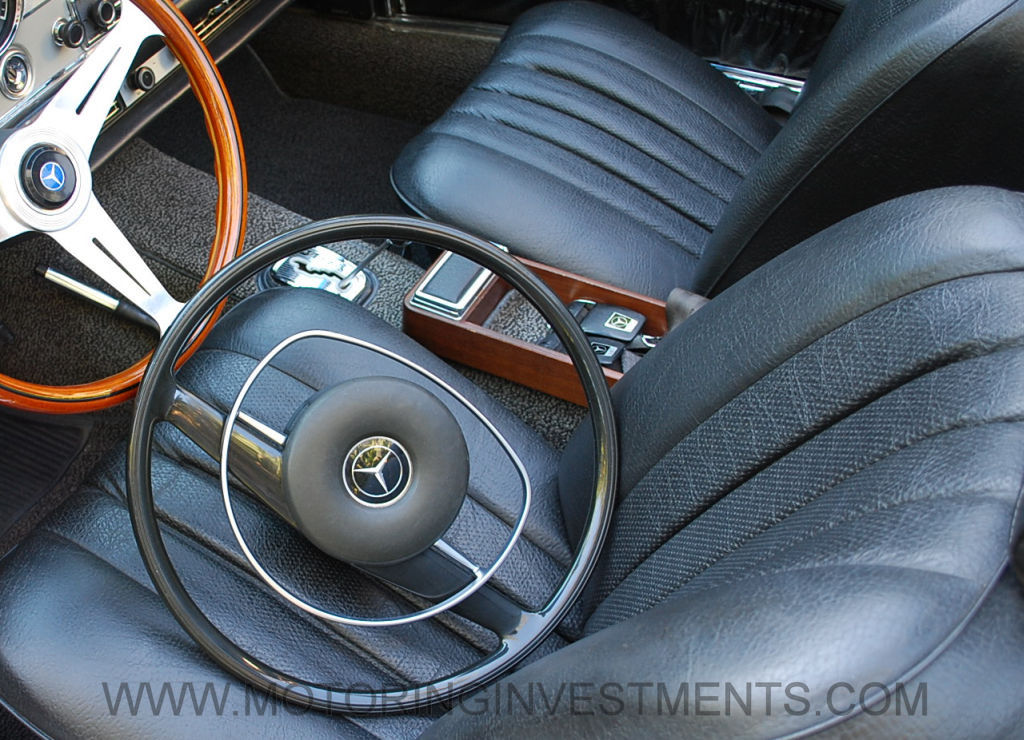
The correct original steering wheel is resting upon the seat above (they also came ivory color). Mounted, is an aftermarket Italian, wood-rimmed Nardi – a period accessory which besides its obviously different look, has the added benefit of a smaller diameter giving more leg room for larger folks.
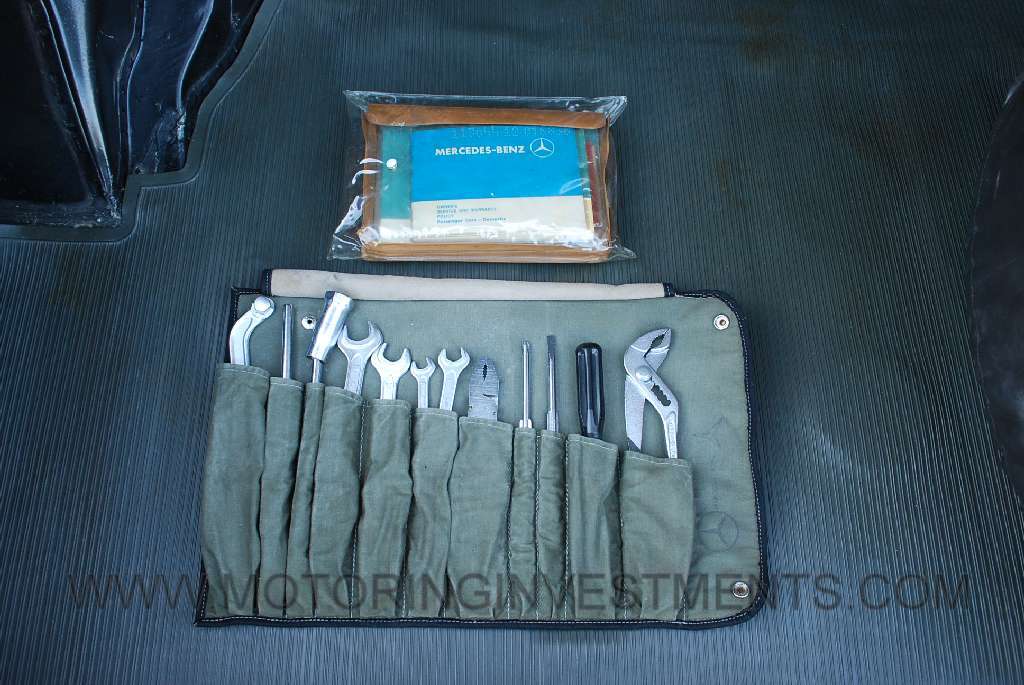
The photo below shows an original tool kit, tools and owner’s document pouch. The tool kits were usually stitched together from M-B Tex upholstery material or soft top canvas. Either way they had a green cloth liner. It may be a coincidence but we’ve never seen a tool kit that matched the seat material of the specific 280SL from which it came. It seems that the factory just used whichever pouch they had handy at the time.
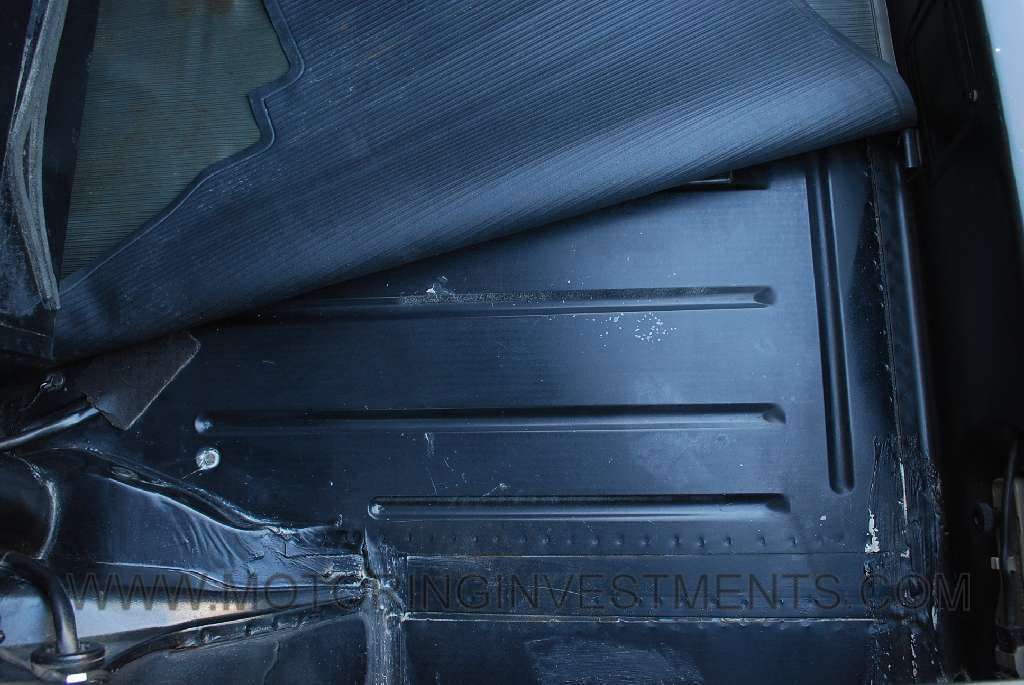
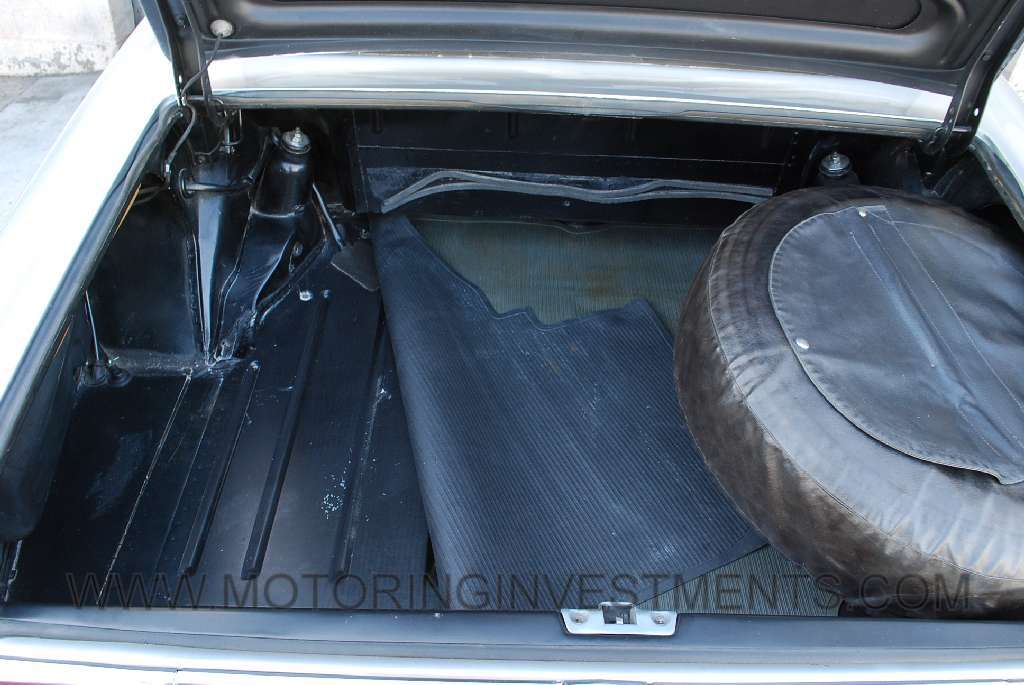
Even many good, warm climate cars have surface rust in the area you see above. The rubber mat can hold condensation against the trunk floor which is only protected by a thin layer of paint and some seam-sealer at the joints. In this case not only is the trunk floor totally rust-free, it as absolutely original (never repainted ex-factory). All factory spot welds are visible. The original rubber mat is still soft & supple rather than burned to a crisp like cars that were left outside all day long in hot climates. This is another indicator of a car that has lead a sheltered life and always stored indoors.
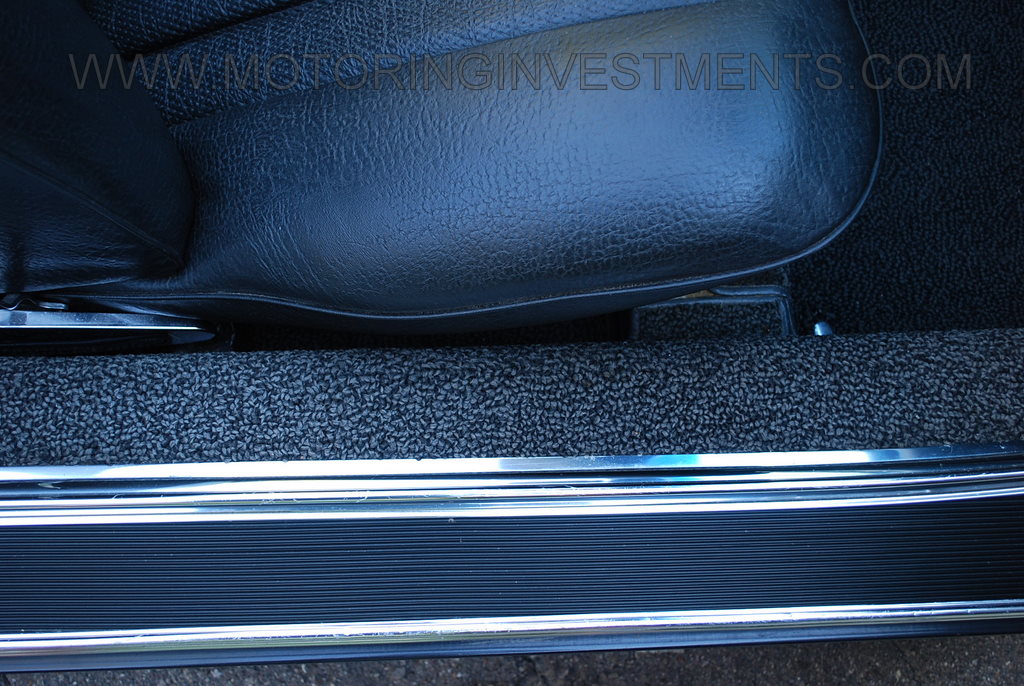
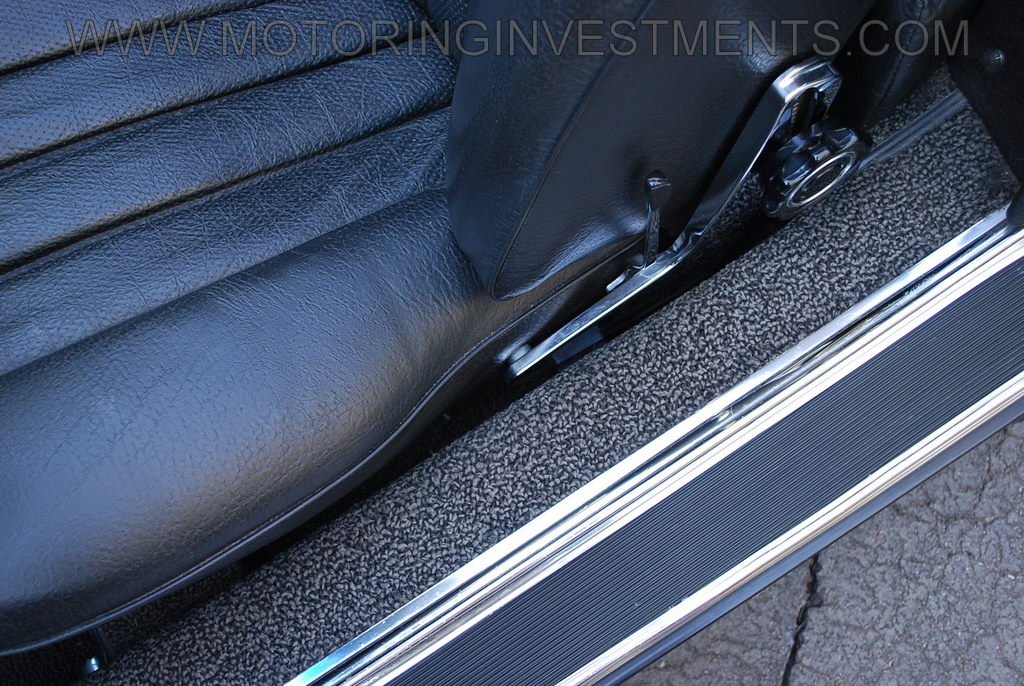
Here are close-ups of the entry garnish strips, sill pads, multi-loop carpet and seat covers – ALL ARE ORIGINAL.
Note: I use the term “original” in the strict sense, meaning these actual materials have been on the car from the time it was manufactured.
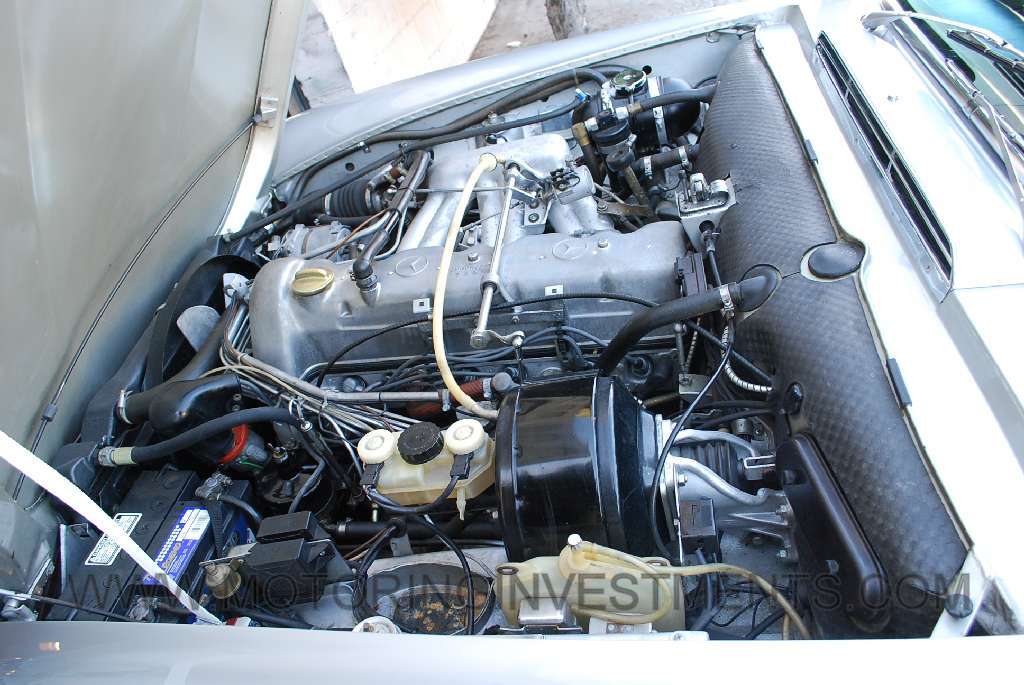
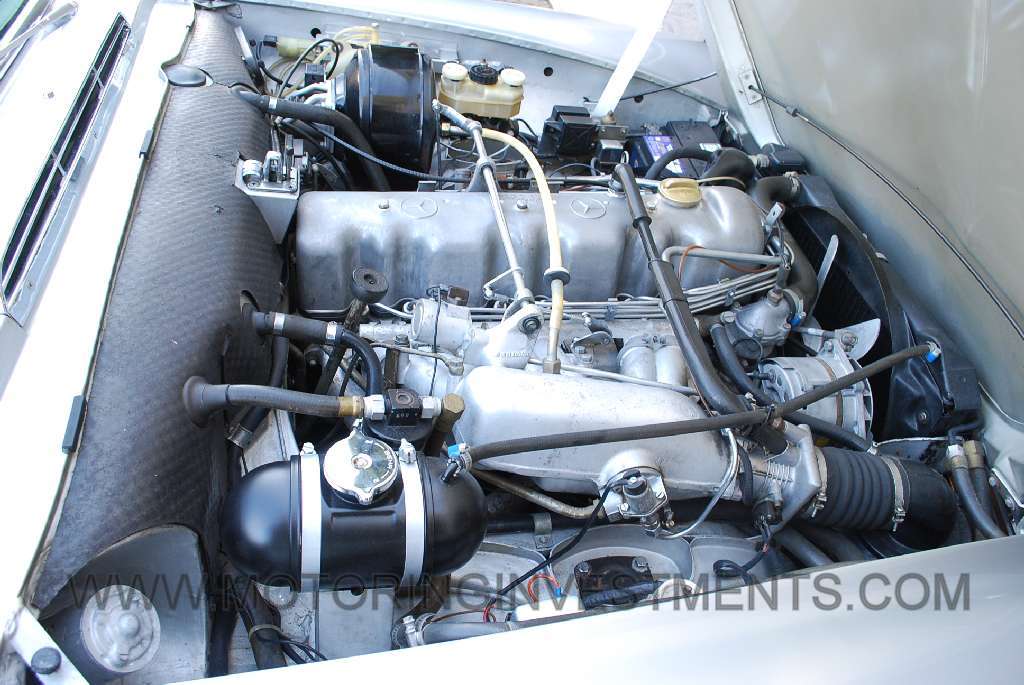
Just the clean engine bay of a low mileage car. Engine bay and underside of hood are body color. Coolant expansion tanks are satin-black (or opaque white plastic on some ’71 models). Valve cover, intake plenum and manifold are natural alloy (not polished). 280SLs did not have plastic shock tower covers like 230SLs and maybe 250SLs did.
The Undercarriage
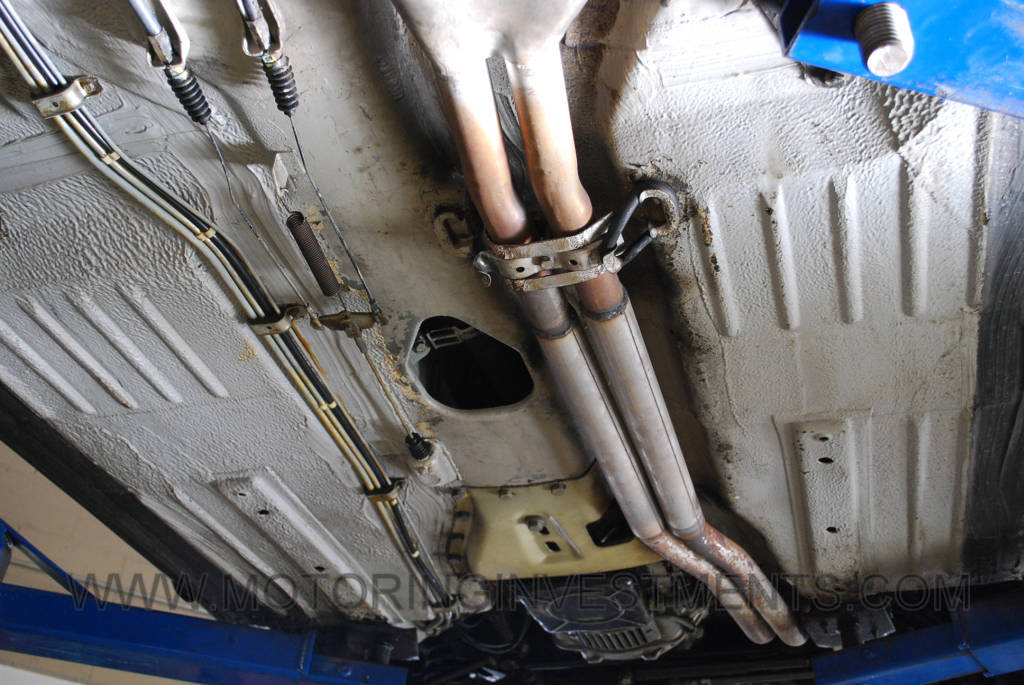
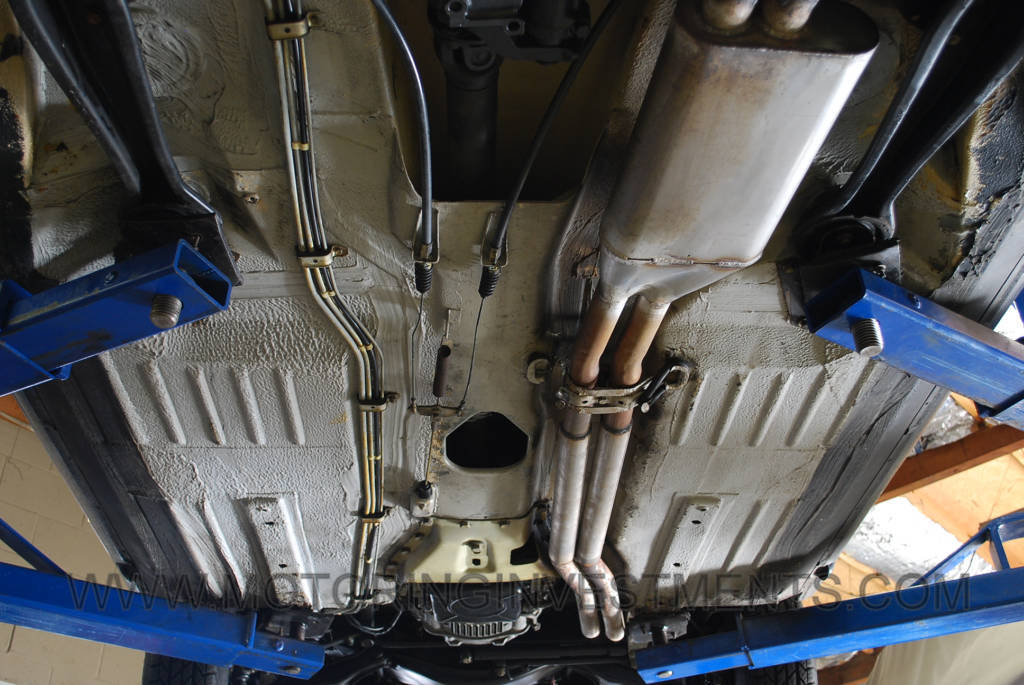
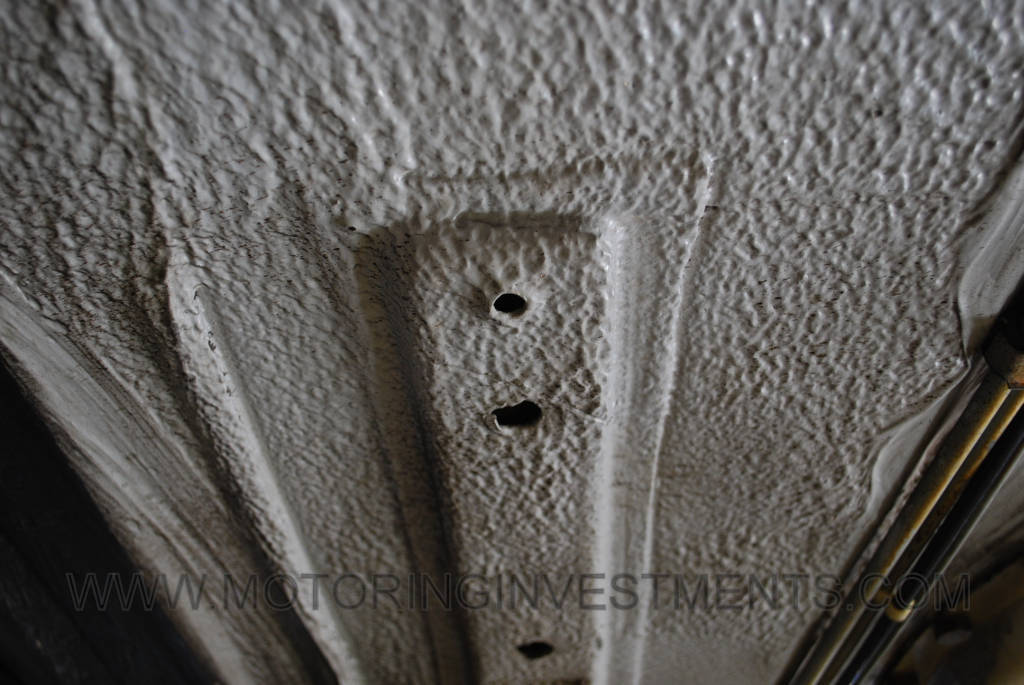
If you are fortunate enough to be provided with undercarriage photos by a seller you may see a variety of things. It may be no more than the usual road dirt covering a nice original floor pan. It may however show gaping rust holes or evidence of a quick “patch & cover-up job”. The factory never used black, tar-like goo the we sometimes see. That may be no more indicative than an attempt by the selling dealer in a snowy climate to further rust-proof the car. Unfortunately this aftermarket undercoat was many times added after the factory undercoat had been already compromised by years of freezing and thawing road slush. In that case the new undercoat does no more than trap moisture against the already rusting metal thus accelerating the process. This is why warm climate cars are so prized(we’re back to the importance of a sound, original body again). Careful of the term “no visible rust”.
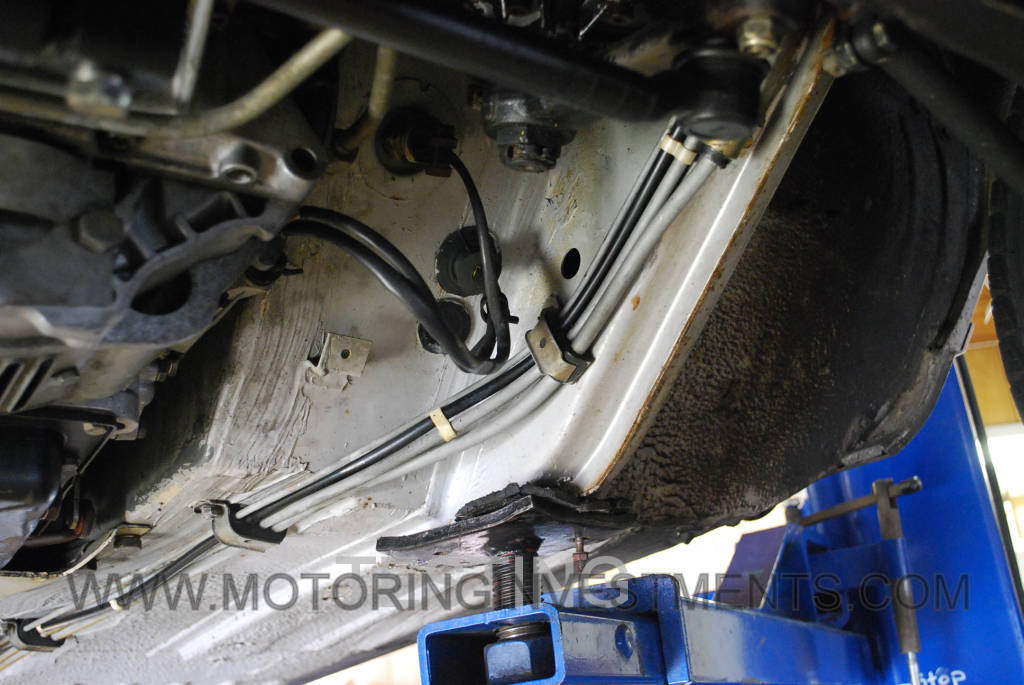
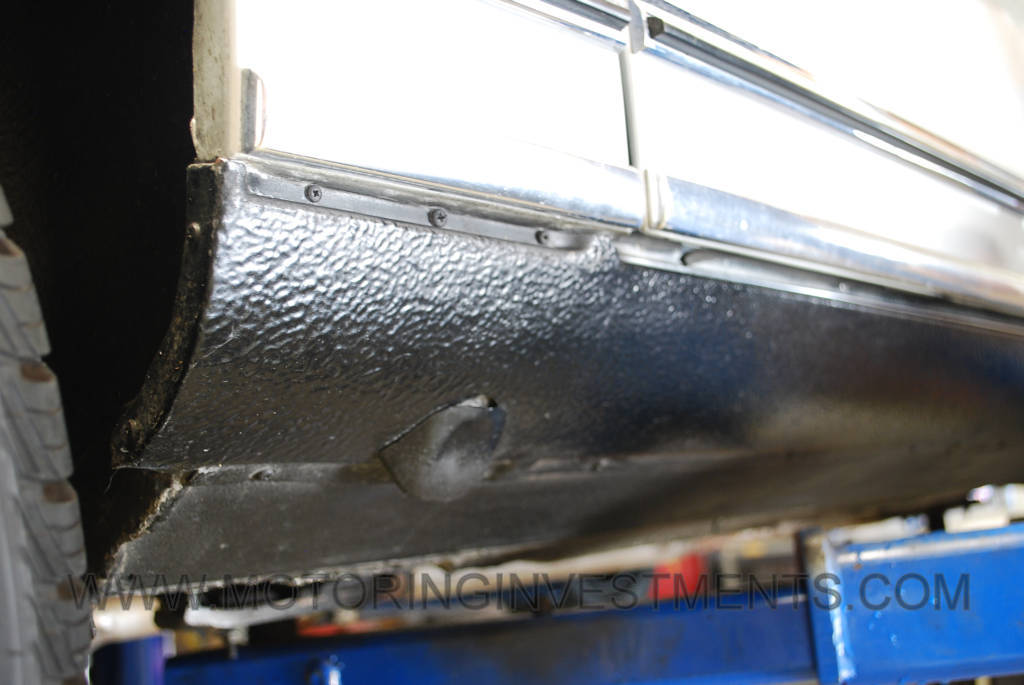
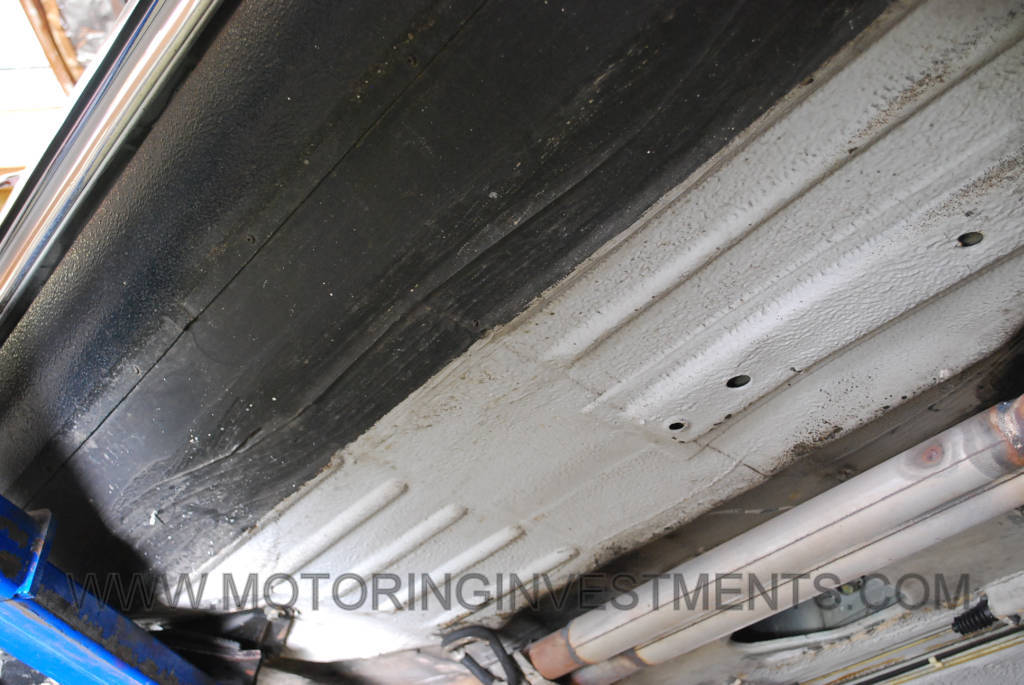
On this car after a careful cleaning of the road dirt we find a nice original floorboard with its factory polymer based undercoat still wonderfully intact. These photos show exactly what an original undercarriage should look like.
The removable rocker panels are held on by Philips head screws and are always semi-gloss black over a texture coat or bumpy surface “chip-guard”. The black paint continues down onto the floorboard to about the first strengthening rib.
